Appearance
📍 Manage Locations
🎯 Purpose
The Locations module is essential to structure and map asset inventory against physical zones. Every asset in the system is tied to a specific location for tracking, auditing, and reporting.
🧭 What You Can Do
1. View All Locations
The Locations / List page displays:
- ✅ Location Code and Name
- 📦 Total Assets in each location
- ✅ Asset status counts (Available, Not Available, Maintenance, Others)
- 🟢 Status (Active/Inactive)
- ⚙️ Actions (View Details, Edit, Delete)
Admins can also filter locations by name and status for easy access.
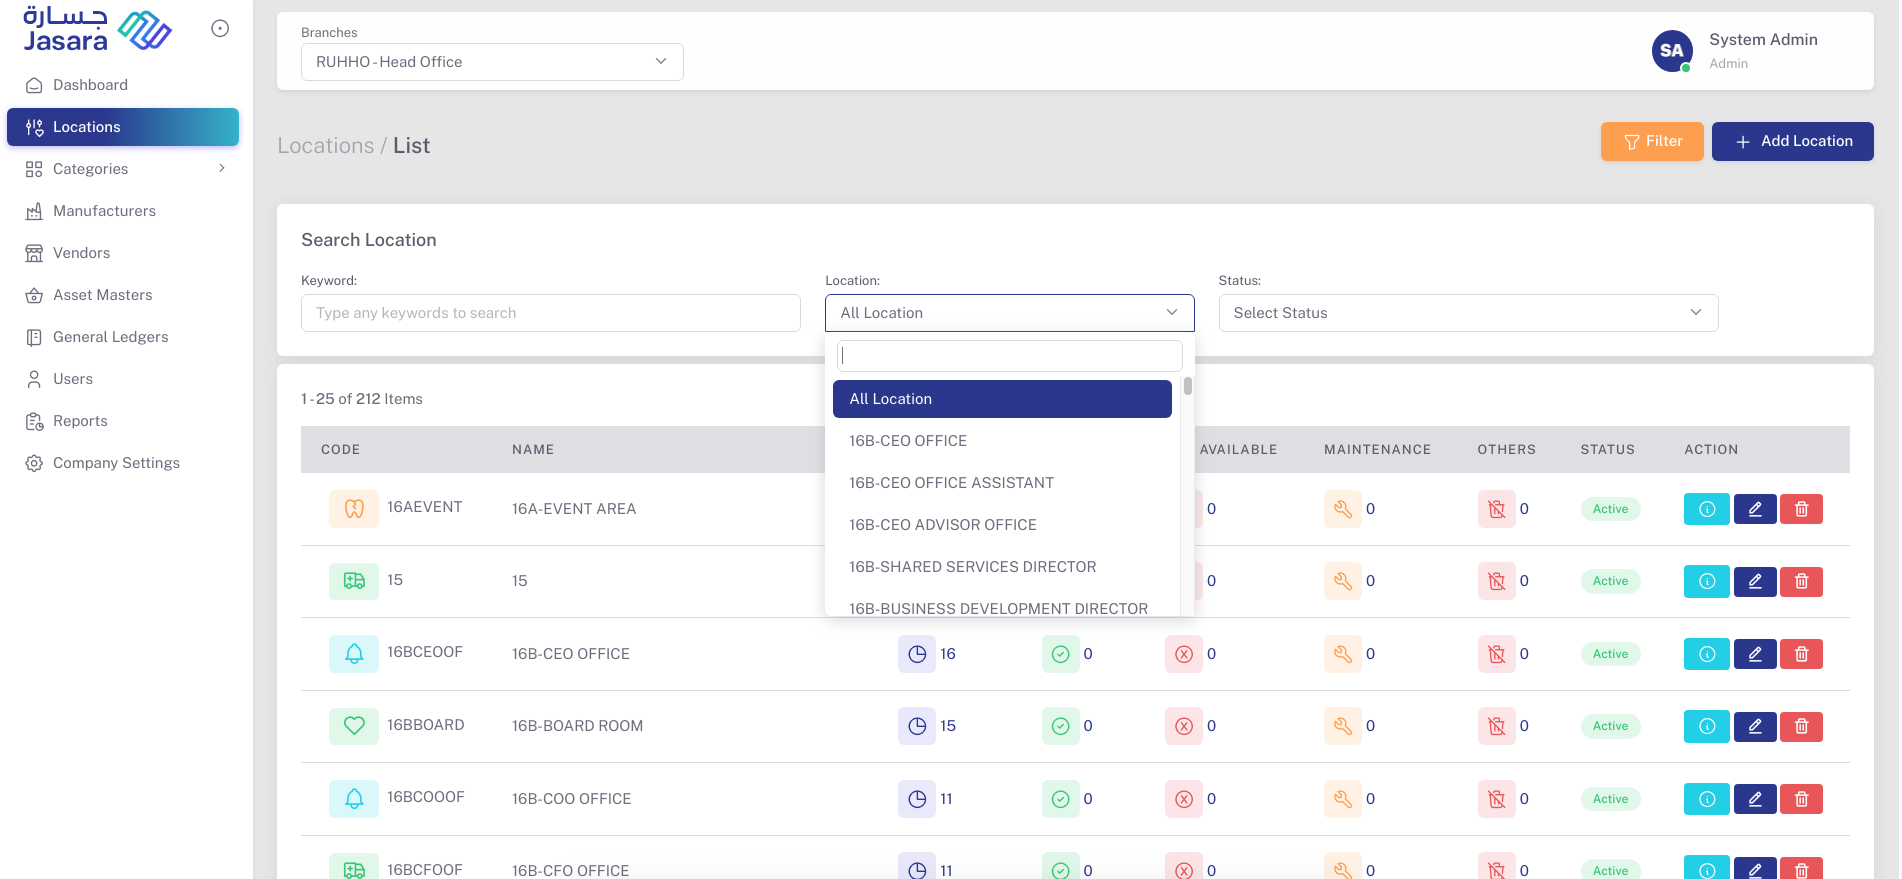
All Locations
2. Add a New Location
From the + Add Location button:
- Enter a unique Code (used as an identifier)
- Provide a Name (e.g., "16A-Event Area")
- Set the Status (Active/Inactive)
- Click Save
Once saved, the location is added to the system and ready to be used during asset tagging or auditing.
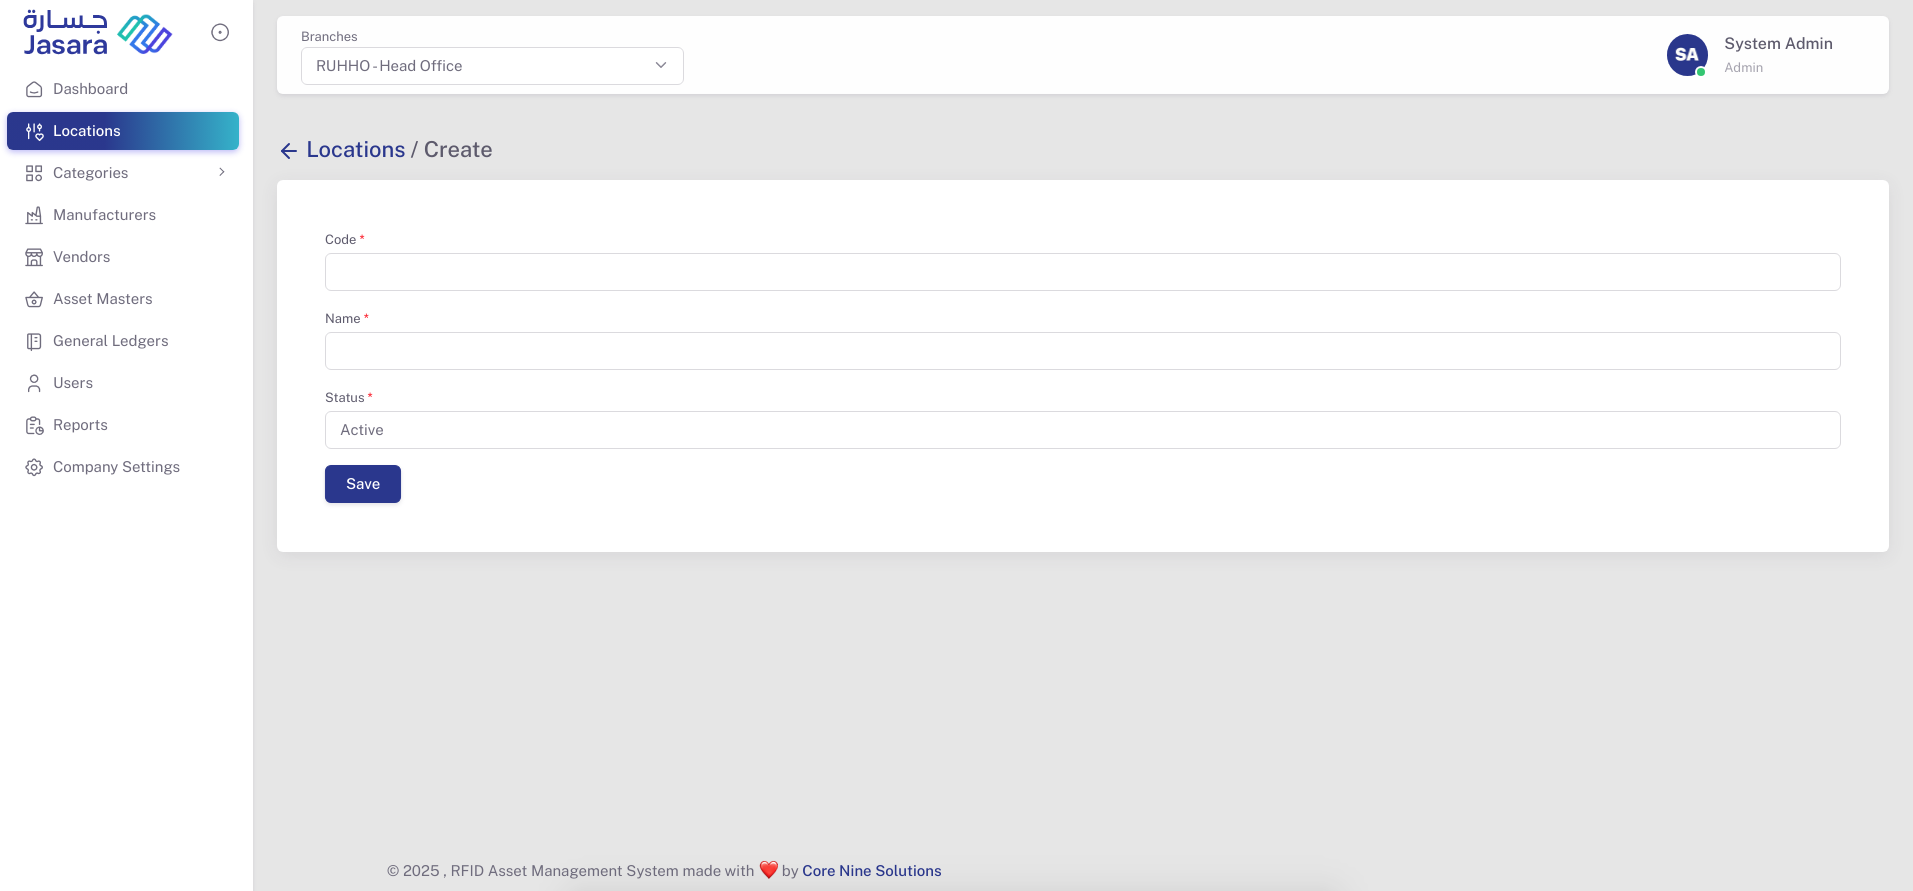
Add New Location
3. Edit or Delete
From the Actions panel:
- ✏️ Edit to modify location name, code, or status
- 🗑️ Delete to remove a location (if no assets are tagged under it)
4. View Location Details
Clicking the 🔍 Info Icon opens the Asset Detailed View, showing:
- Location name and creation timestamp
- Breakdown of asset statuses:
- 🆕 New
- ✅ Available
- ❌ Not Available
- 🔧 Maintenance
- 🗑 Disposed
- 💥 Damaged
- 🚫 Removed
- 📋 List of all assets in the location with:
- Tag Number
- Description
- Current Status
A mini statistics graph provides a visual summary of asset statuses within that location.
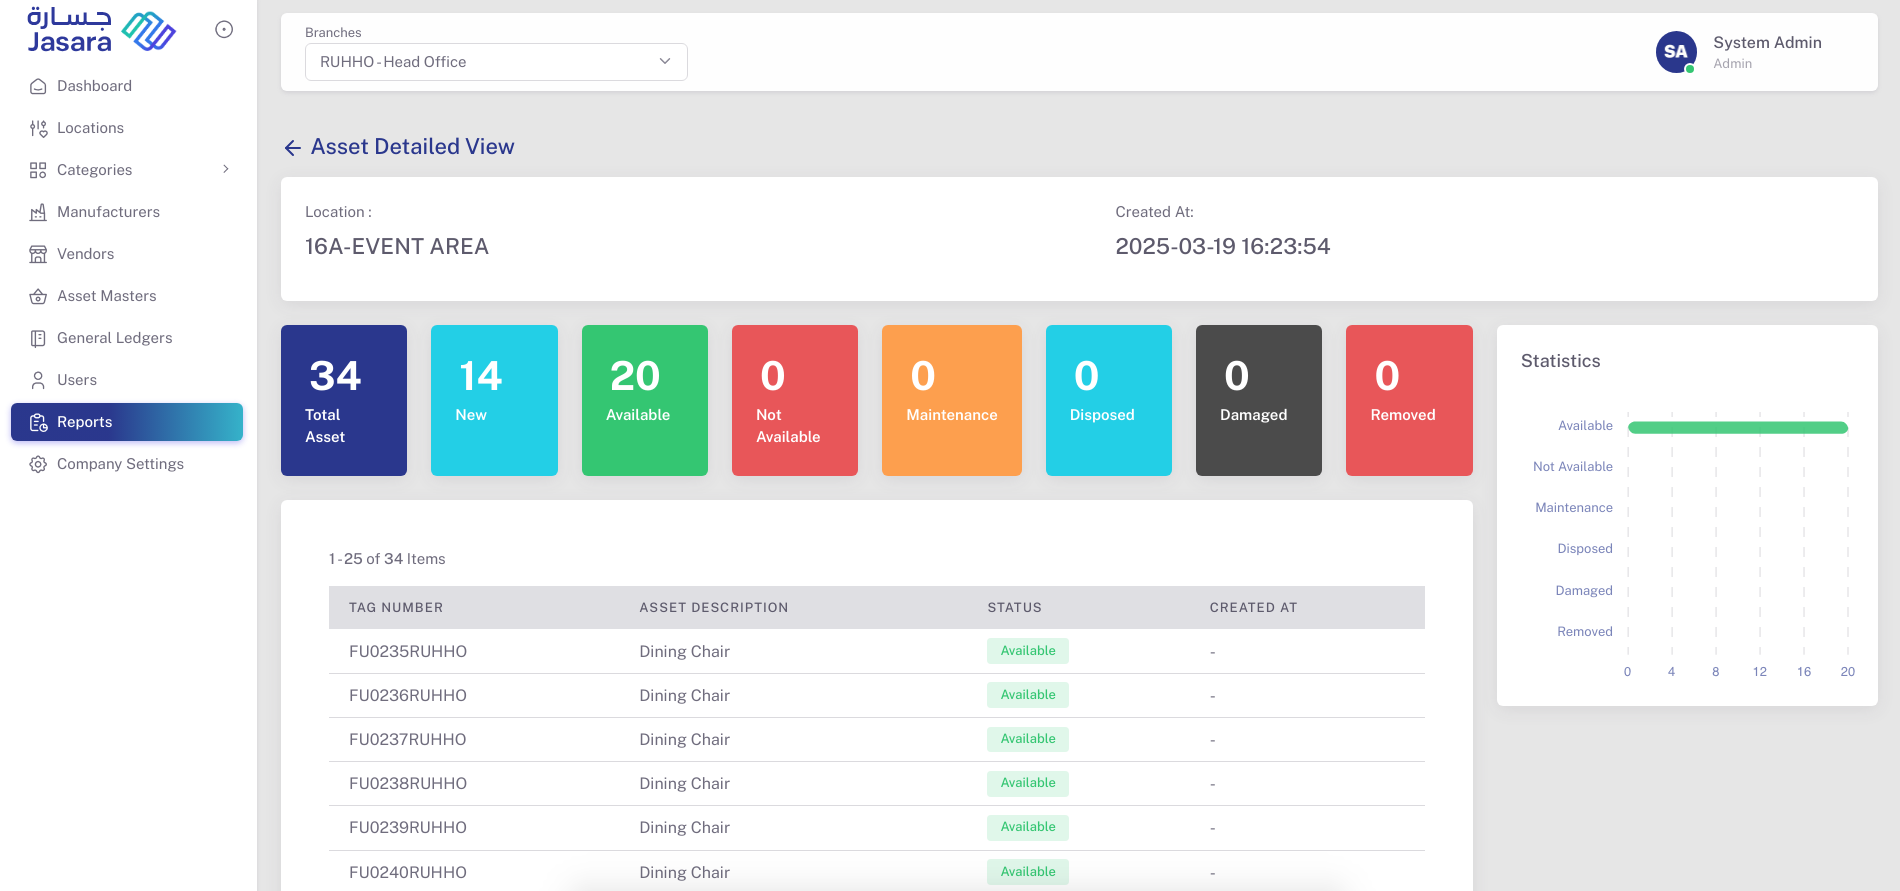
Location Detail View
📌 All future audits, asset assignments, and maintenance activities are tied to these locations. It's crucial to organize them clearly and keep them updated.