Appearance
🏷️ Asset Audit Workflow
The Asset Audit Workflow enables users to verify physical assets against digital records by scanning RFID tags in specific locations. This process helps in identifying missing, misplaced, or untagged assets, and ensures real-time validation and correction of inventory data.
Each audit is location-specific and provides a structured approach to:
- Select the location for audit
- Track progress of scanned vs expected assets
- Detect unknown RFID tags
- Assign or add assets to unknown tags
- Confirm and update asset status post-scan
This flow ensures accountability, operational visibility, and streamlined asset management on the go.
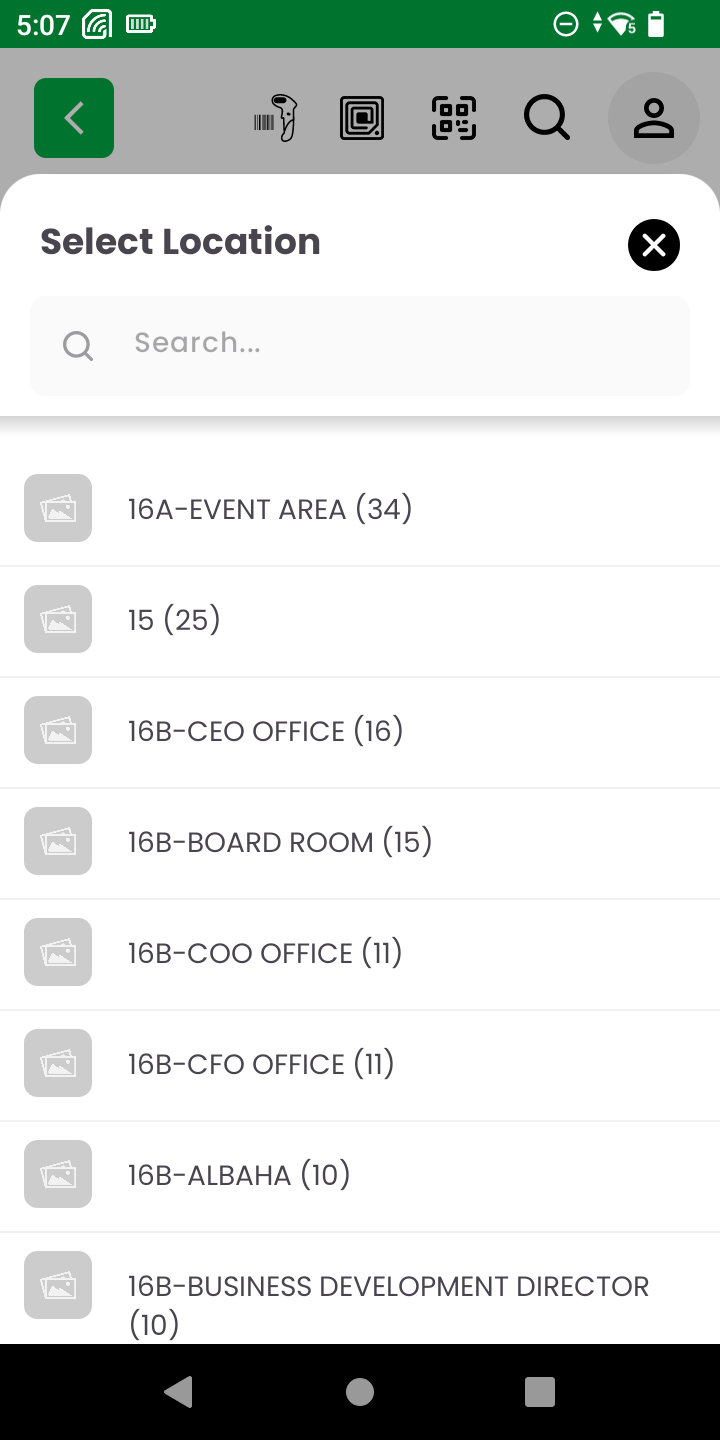

🗂️ Step 1: Select Location to Begin Audit
The audit process begins by selecting the desired location for the audit operation. This ensures that all scanned assets are matched against the expected inventory of that specific physical space.
- Screen: Location Selector Modal
- Search Bar: Allows quick lookup by location name.
- Location List: Displays all available locations synced from the backend, each accompanied by the count of assets assigned to it.
User Flow:
- Open the Audit Scan module from the Dashboard.
- The "Select Location" screen appears.
- Either scroll or search to find the desired location.
- Tap on the location (e.g., "16A - EVENT AREA") to initiate the audit for that area.
This foundational step ensures that the audit results are tied to the correct location and allows the system to validate scanned tags accordingly.
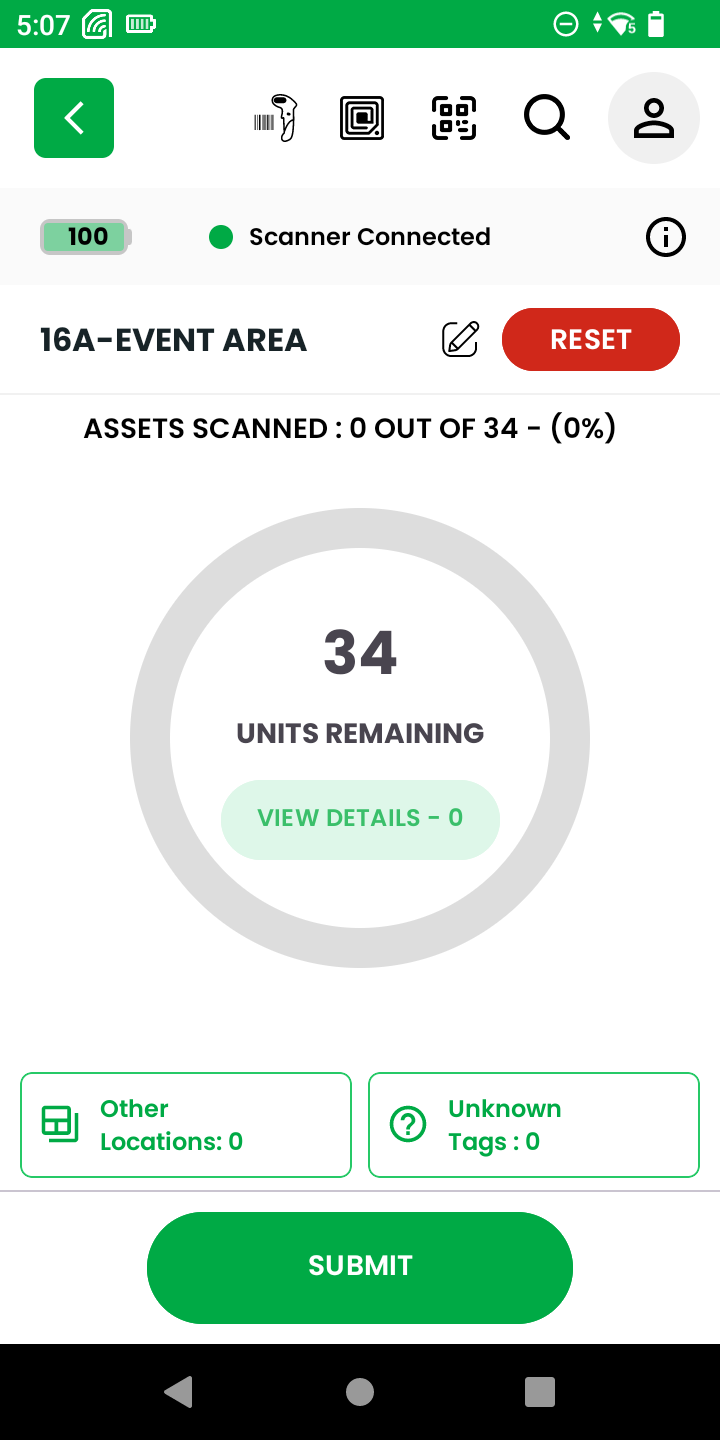
📡 Step 2: Start RFID Scanning
Once the location is selected, the system loads the audit screen for that specific area. This screen shows:
- Location name and total expected asset count.
- Units Remaining: Real-time tracking of how many assets are yet to be verified.
- Other Locations: Tags found in the wrong location.
- Unknown Tags: Tags not previously assigned to any known asset.
User Action:
- Begin scanning RFID tags using the connected RFID scanner device.
As each tag is scanned, the system updates the audit progress automatically and classifies the tags based on their status.
🏷️ Step 3: Handle Unknown Tags and Assign Them
During the scanning process, some tags may appear as unknown — meaning they are not yet assigned to any registered asset in the selected location. These tags require immediate attention to ensure accurate inventory mapping.
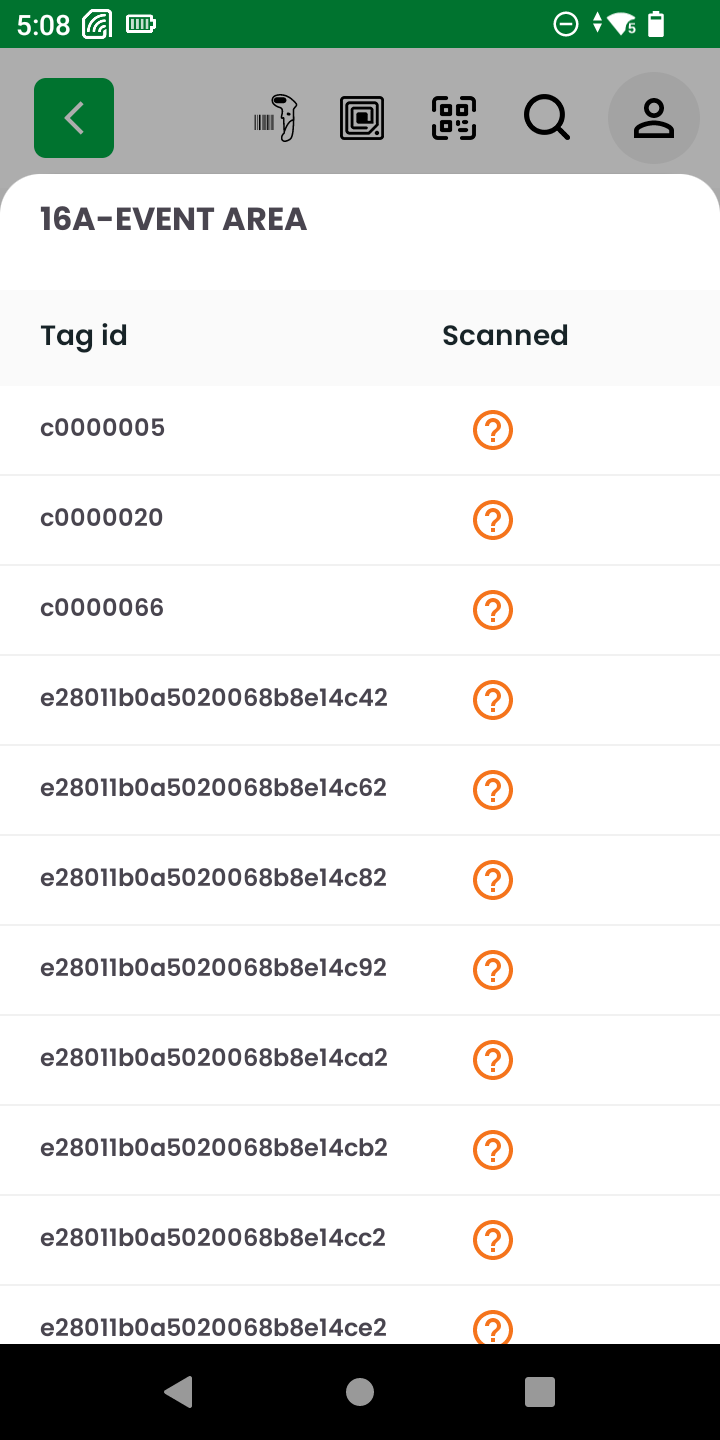
Screen Views:
- Unknown Tags List: Displays each unassigned tag ID with a ❓ icon.
- Tag Action Button: Each unknown tag has an “Assign” button, allowing the user to resolve the issue.
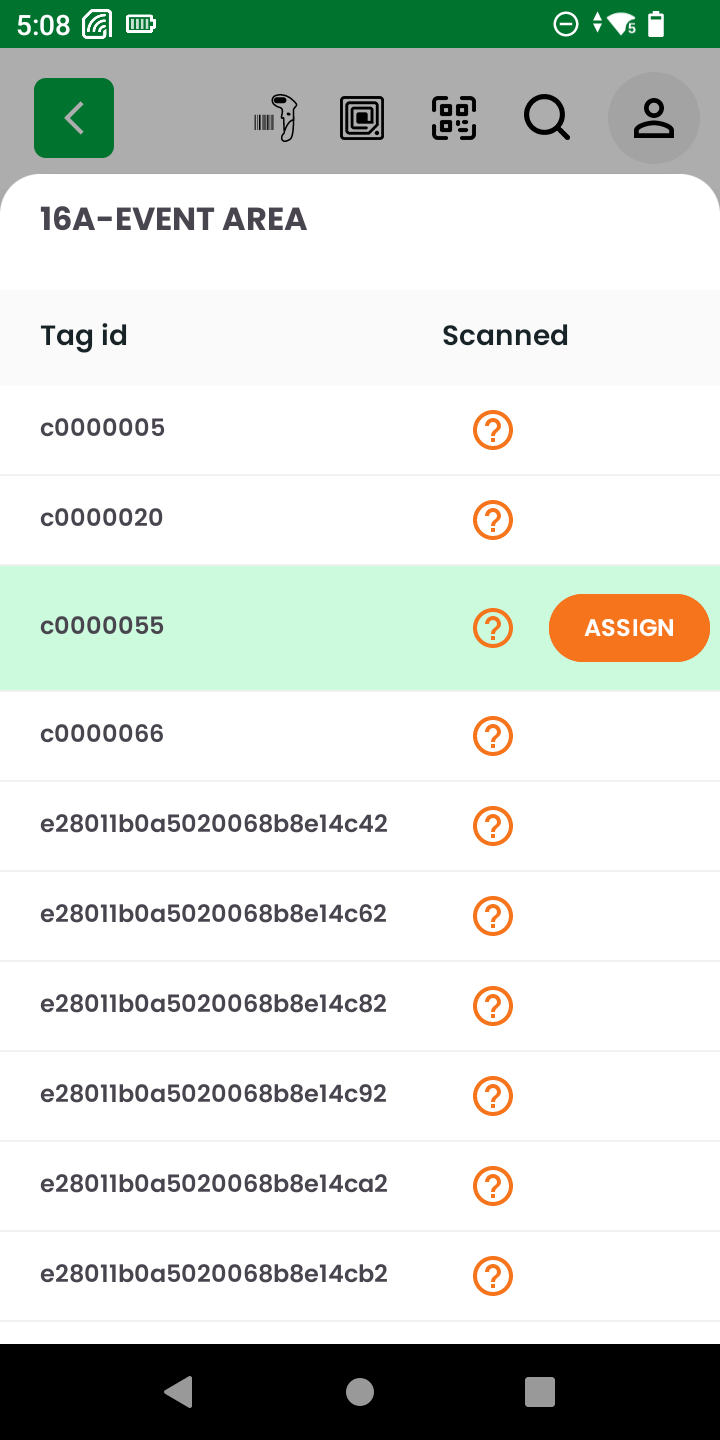
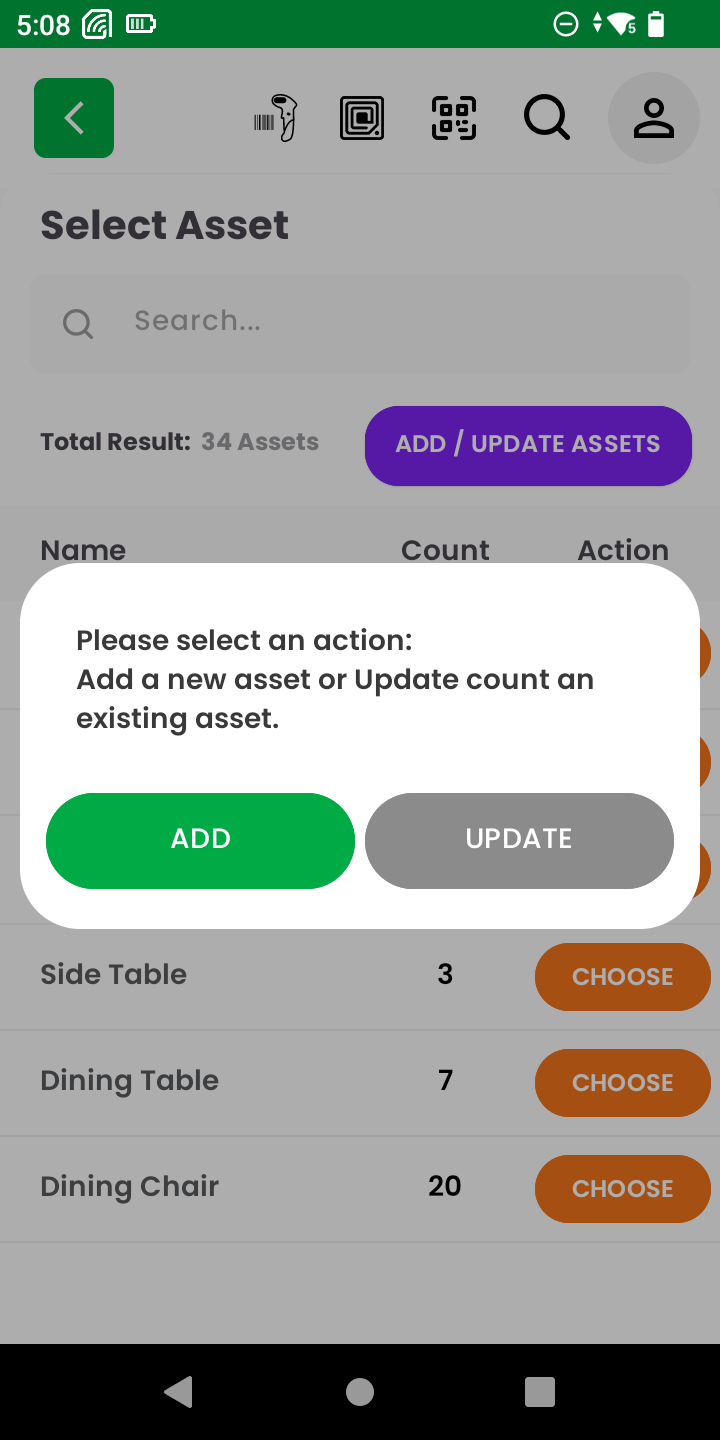
User Options:
- Assign to Existing Asset:
- Tap “Assign” on the selected tag.
- Choose from the list of assets (e.g., Dining Chair, Side Table).
- Confirm assignment to map the tag to the correct asset.
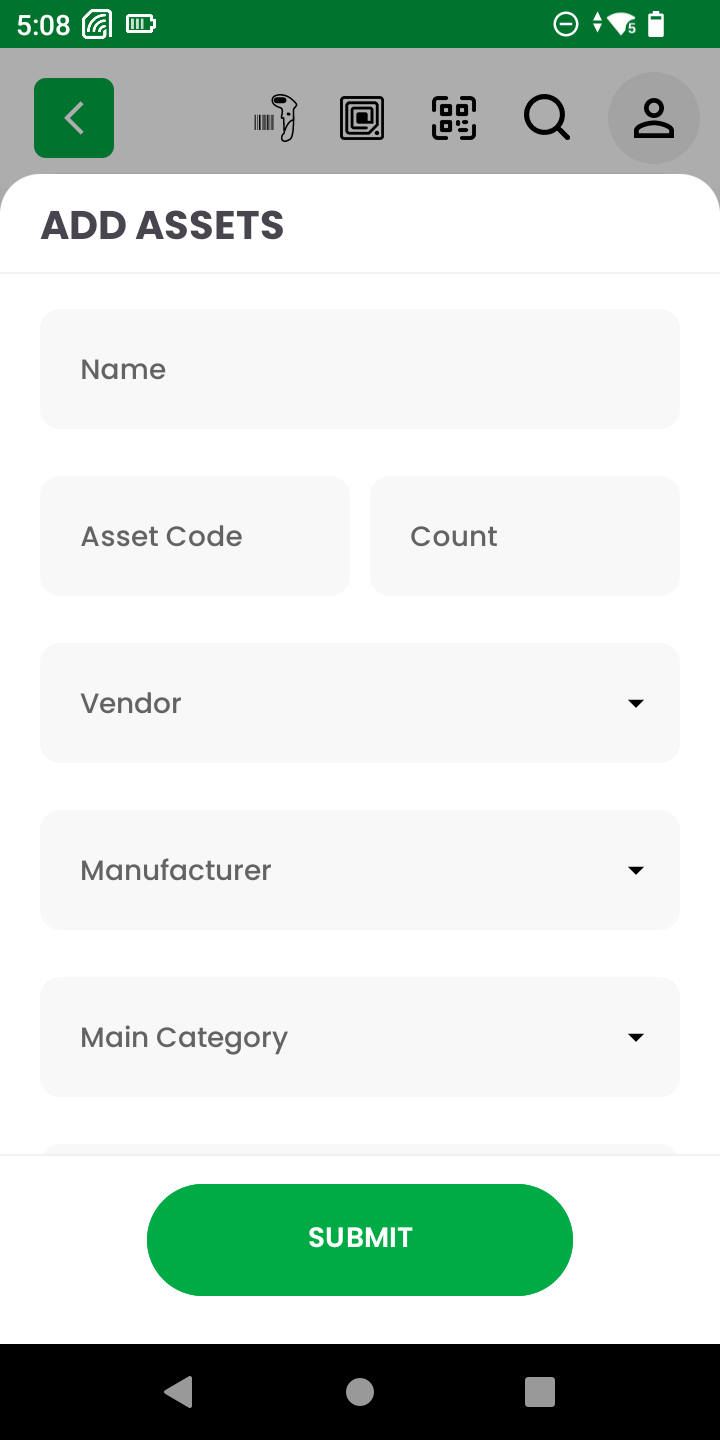
- Add New Asset:
- If the asset is not listed, select “Add New”.
- Fill in asset details such as name, code, location, category, vendor, and manufacturer.
- Tap Submit to register the asset and complete the tag assignment.
Why It Matters:
This step ensures that all scanned RFID tags are accurately linked to inventory items, preventing data loss and minimizing mismatches during audits.
✅ Step 4: Assign Tag to Asset
Once an unassigned RFID tag has been selected for action, the app provides a list of existing assets under the selected location. This enables the user to correctly associate the scanned tag with the corresponding asset.
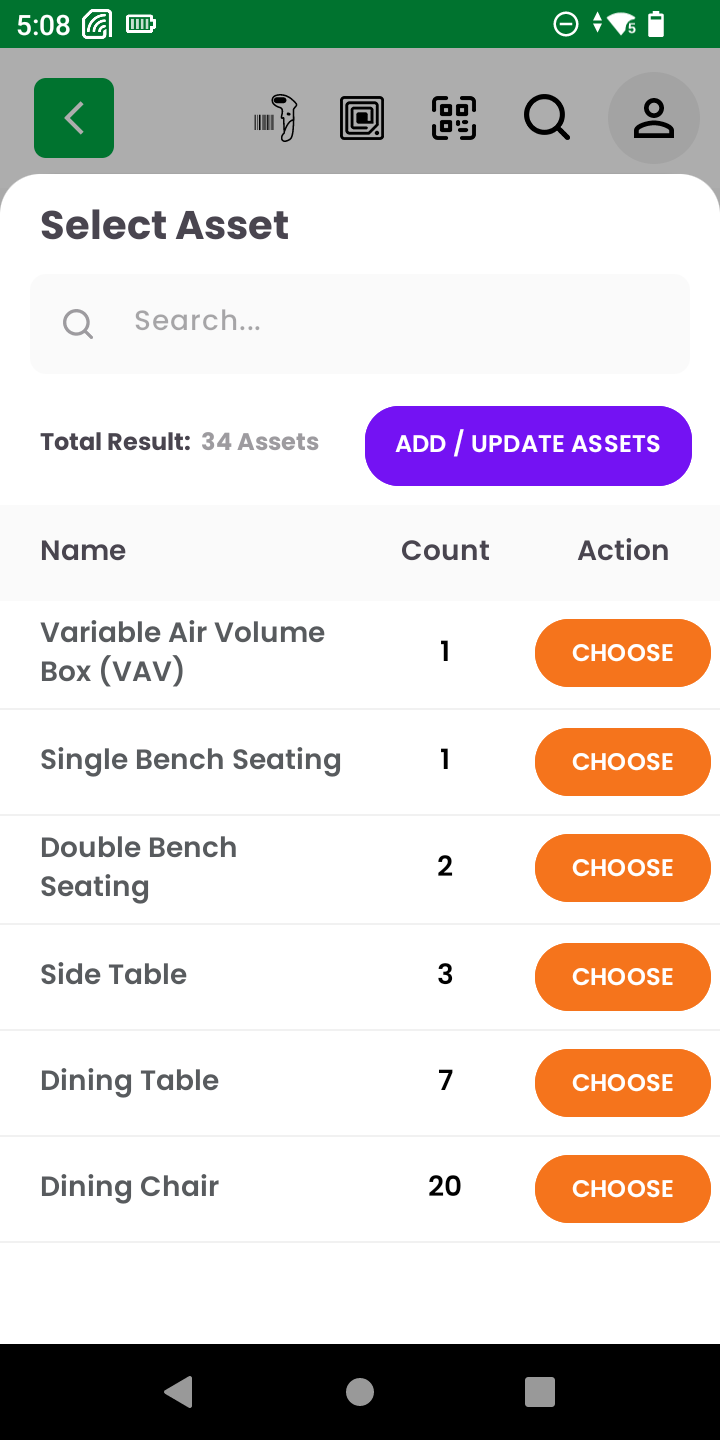
Screen Views:
- Asset Selection List:
- Displays asset names (e.g., Variable Air Volume Box, Dining Chair).
- Shows the count of each asset available for assignment.
- Includes a “Choose” button to initiate mapping.
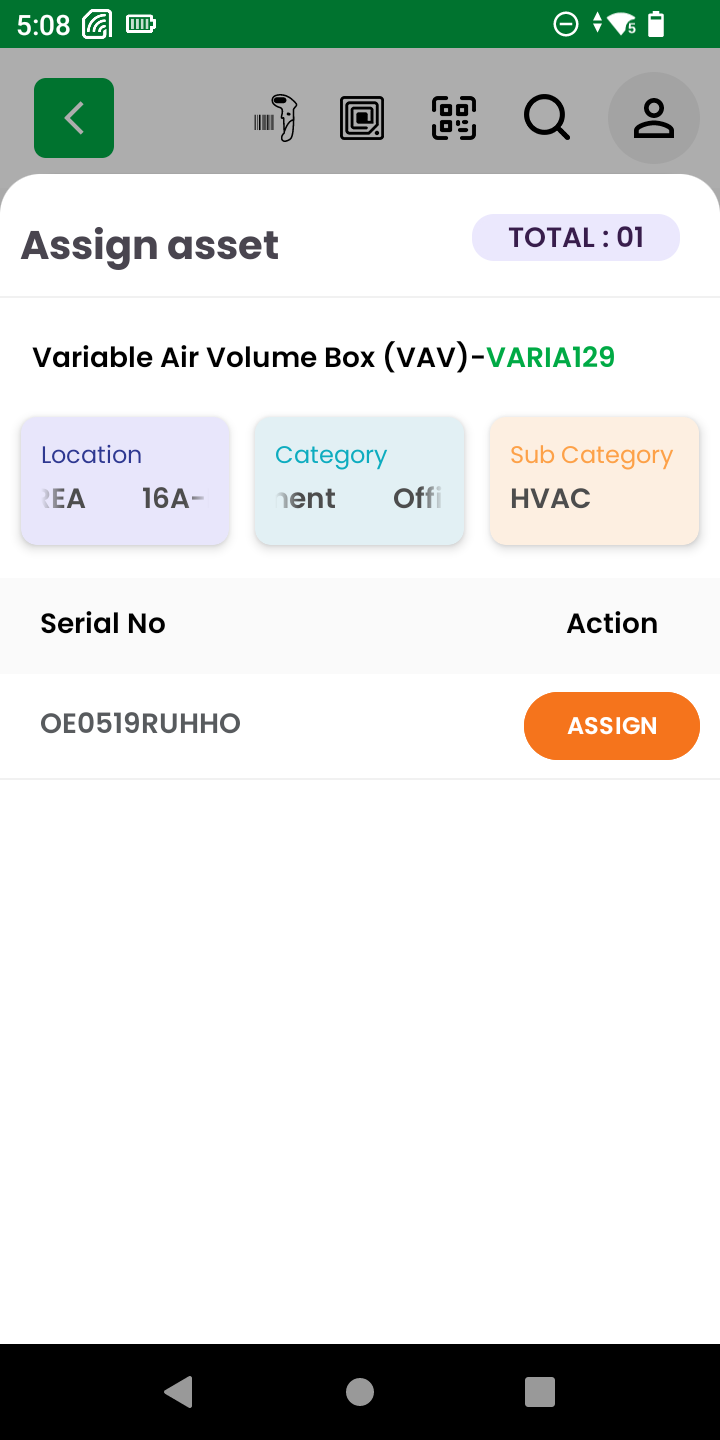
- Assign Asset Screen:
- Shows full asset details such as:
- Location
- Category
- Sub Category
- Serial Number
- Includes an Assign button to confirm the tag-to-asset mapping.
- Shows full asset details such as:
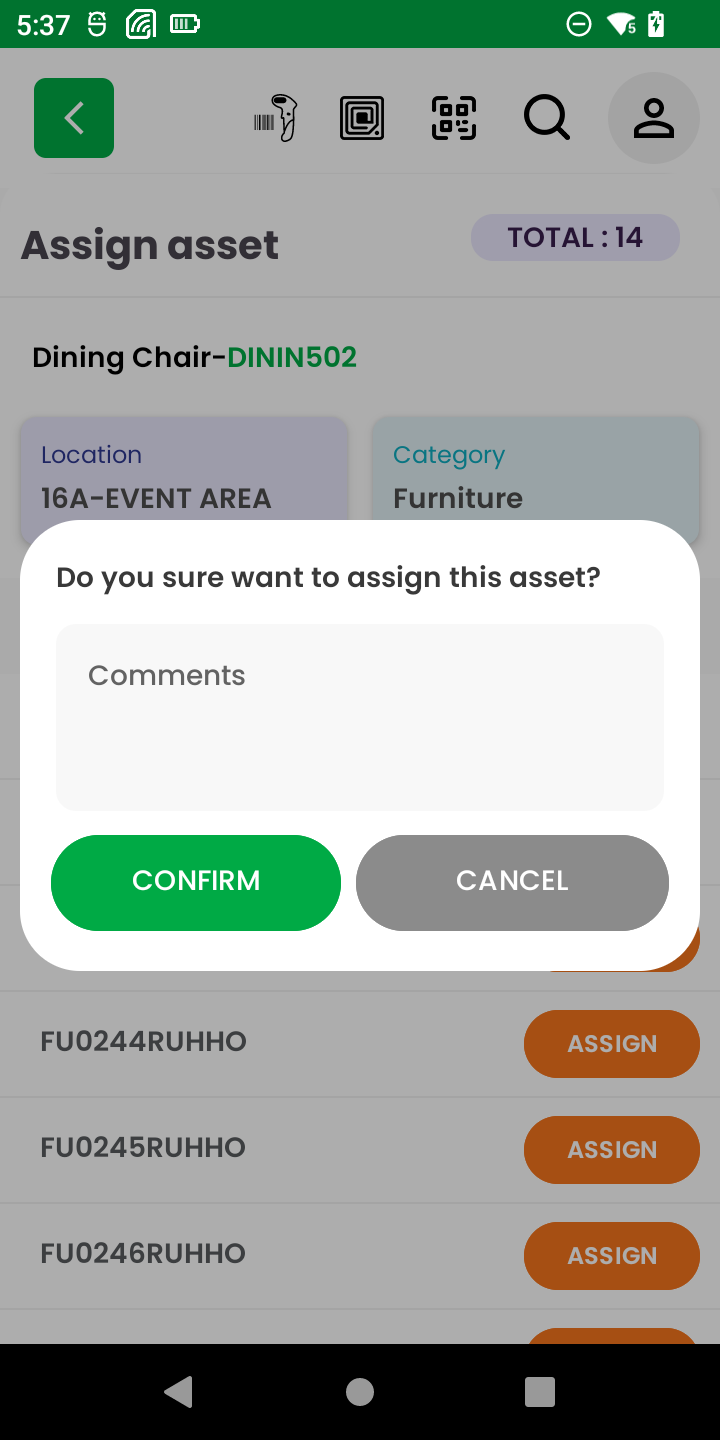
- Confirmation Modal:
- Prompts the user to confirm assignment.
- Optional comment box for any remarks or notes about the assignment.
User Flow:
- Tap Choose on the appropriate asset.
- Review the asset details in the Assign Asset screen.
- Tap Assign, then Confirm in the popup.
- The tag is now officially linked to that asset.
Why This Step Is Important:
By accurately assigning tags to known assets, you’re reinforcing the integrity of your asset records, ensuring each physical item is digitally trackable via RFID.
📋 Step 5: View Audit Details by Asset Status
Once a portion of tags are scanned and assignments are complete, users can review the scanned asset list by status:
Tabs Include:
- New: Assets that were added during the audit.
- Available: Assets found and matched successfully.
- Not Available: Expected assets not yet scanned.
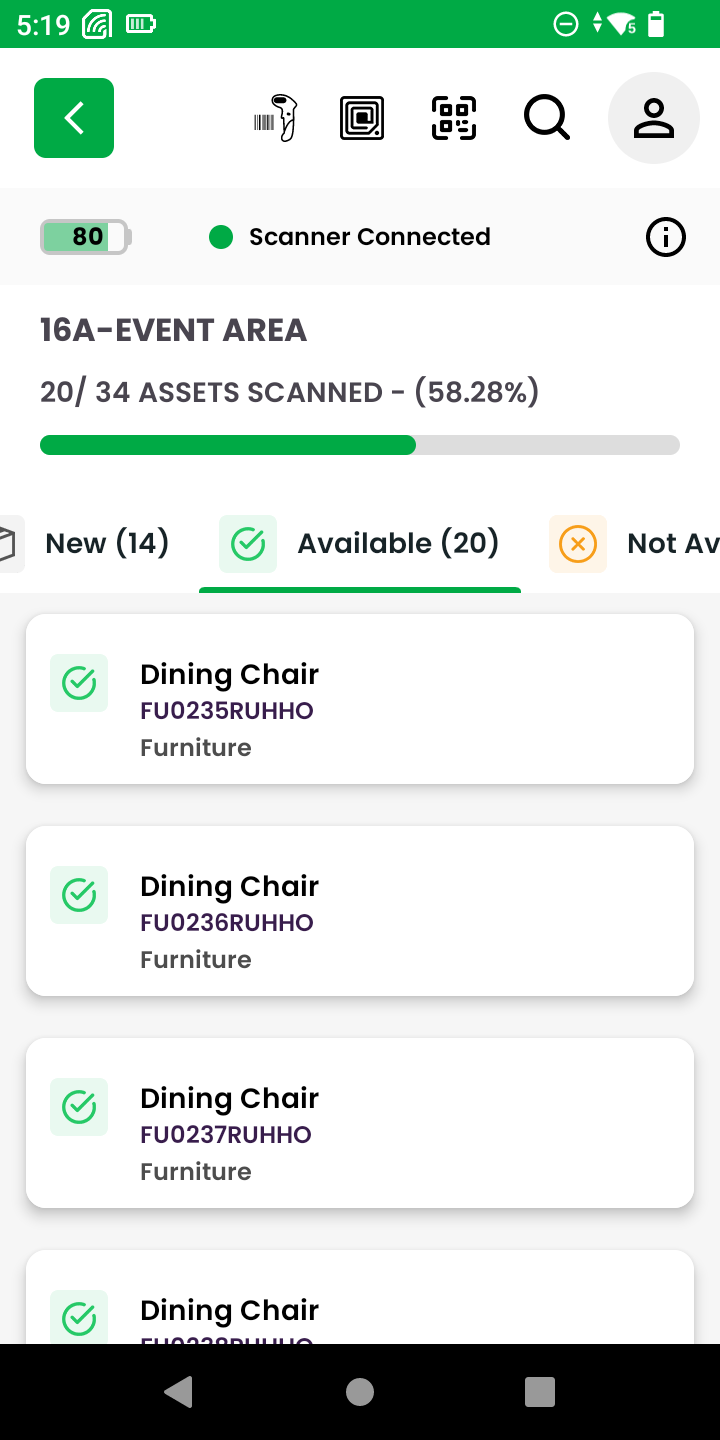
This categorized view helps users:
- Monitor audit progress.
- Take corrective action if some assets are missing or misassigned.
- Get a clear picture of audit coverage.
Use the View Details button on the main audit screen to access this categorized asset listing at any time during the audit.
✅ Step 6: Submit and Confirm Audit Results
Once the audit is complete, users are presented with a final review screen:
- Audit Location: Displays the location being audited.
- Comments Field: Optional section for entering additional remarks.
- Expected Section: Shows the count of successfully scanned/available assets.
- Unknown Section: Indicates any unassigned/unknown tags that were encountered.
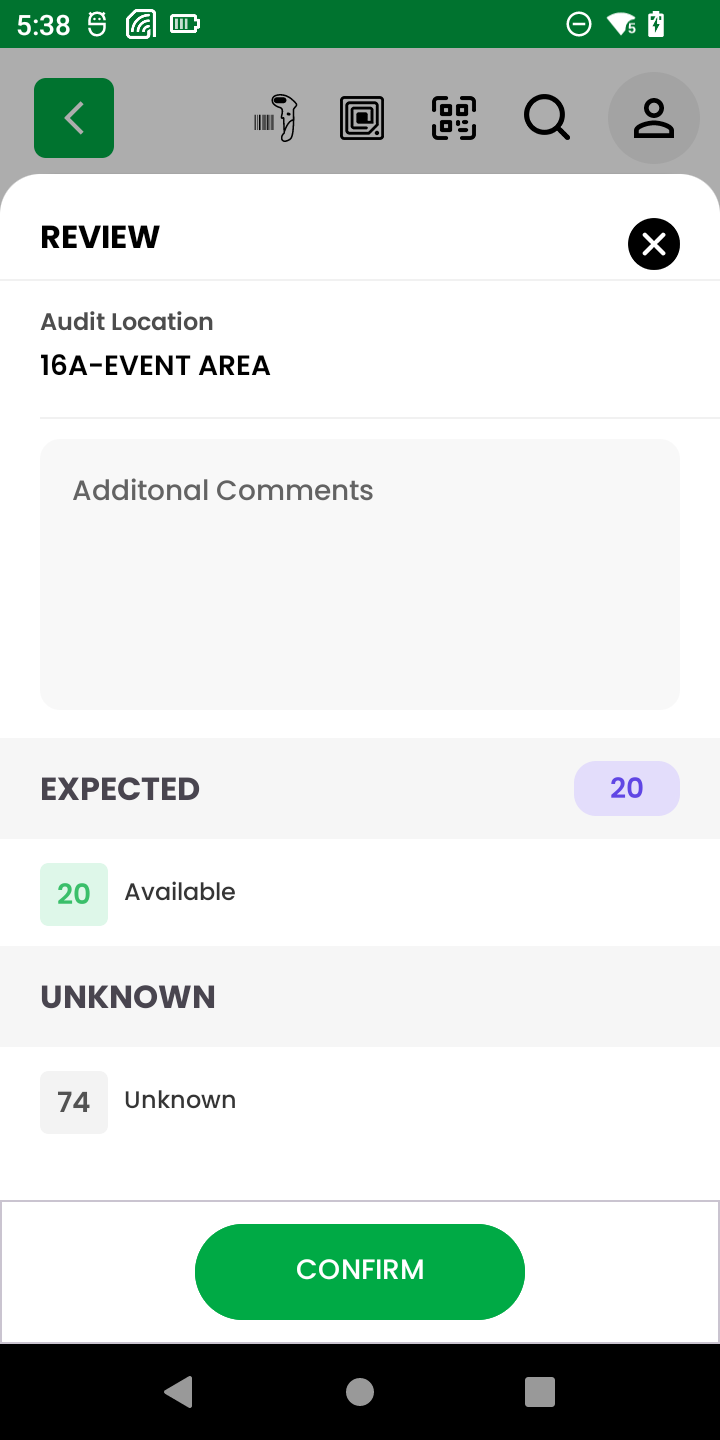
Action:
- Tap Confirm to finalize the audit.
- This updates the backend with the completed audit data, logs changes, and marks the audit as submitted.
This final step closes the audit loop and ensures all asset data is current, validated, and recorded for reporting.